Huh? My thoughts exactly when I first learned about the assignment for my class last week.
Do share, how does one paint with light? That’s my question exactly when I learned that I would actually be painting with light.
Photo Project – Painting With Light
Using Time or Bulb exposures and a flashlight can genterate fantastic and creative images.
Equipment – Flashlight – A “Maglite” or led flashlight works perfectly. An 8.5 x 11 sheet of black construction paper (recommended) to “cone” the light for more light control. Dark clothing. Cable Release or Romote and a Tripod.
Subject – Friends, family, objects found or placed. Automobiles, trees, buildings,You name it! All’s fair in this assignment.
Procedure – Using lenses of your choice, you are to place your camera on a tripod, open the shutter and, using a flashlight or other constant light source, “paint” your chosen subject (s) with light. Remember, painting with light is just like using a can of spray paint. The more you leave the “spray” (flashlight) in place, the more light and density will build. Be careful of ambient light such as street lights, window lights, etc. They can cause unintended density buildup…HAVE FUN! BE CREATIVE!
Having poured myself into this assignment and reading all of the directions at least 4 x’s, I got my things together and went to work.
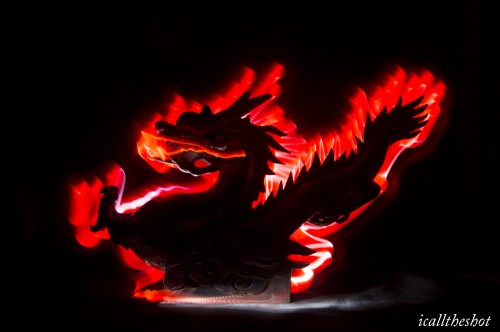
Here’s how I created the subject (dragon) below.
First and foremost, I waited for it to get pitch black outside. Then I moved into our bedroom and closed the door. I did not want any extra light interrupting and spewing onto my nice black canvas.
I wore a long black sleeve shirt and dark bottoms “a must”!
I set up the ironing board and placed one of my solid black dresses over the top such that my canvas would be black when light bled onto it. Then placed my subject.
Next, I got the tripod all set up with the camera. And set the shutter speed for a “LONG” 30 second opening = I used every bit of those 30 seconds to paint the dragon.
Using a small Maglite, I covered the end of the light with my thumb to give a red glow. I won’t go into the detail of how I discovered this, but I love the outcome.
Next I was in place behind the subject (pointing the light towards the camera), grabbing my remote with the other hand to engage the camera.
I had a full 30 seconds to paint what I wanted to achieve (fire).
I started on the right and worked quickly to get all the way around. When I reached the front left side, I had already positioned myself in front of the dragon. Then I quickly released my thumb from the tip of the light to produce that nice white glow at the base of the dragon. My hopes were to achieve the look of him in the clouds and I believe my goals were accomplished in the shot below.
Now, GO have some fun painting with light! Who KNEW this was possible?
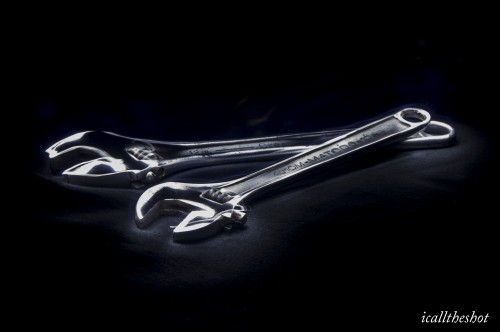
For my next subject I used the hubs tools. These guys were placed on the ironing board and on top of my black dress as well.
Only this time, I took a dark piece of (rather thick) paper and formed it into a cone over the small Maglite. The tip (where the light streamed thru) was probably no bigger than an eraser.
This shot was achieved by tracing the tools with that cone attached to the end of the light.
With this assignment, I learned that I just scratched the tip of the gigantic iceberg. Painting with light has no boundaries in terms of what you use for the subject and the light source. Flashlights, glow-sticks, sparklers and fire are just a few things out of many that can be used to paint. And it was so cool to see what the other students came up with. Makes my imagination run “wild”.
As the weeks go by, I continue to learn that I still have so much to learn. I think I see another photography class in my future (next semester).
In other news: The hubs asked if I felt the “mini” earthquake last night. Nope, I slept right thru it.
Blessings – Debbie


